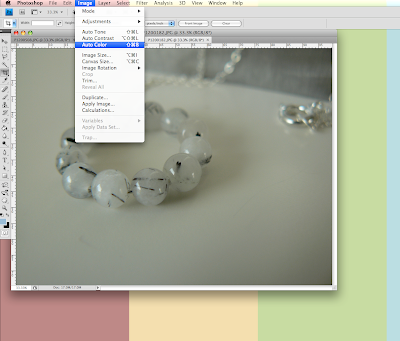
Open your picture in Photoshop and click "images". You will then see a dropbox where you click "auto colour". This will usually correct your colouring.

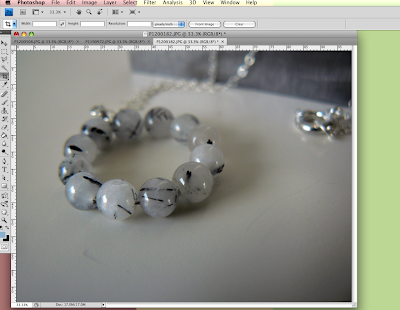
This image shows what the "auto colour" did to my picture.

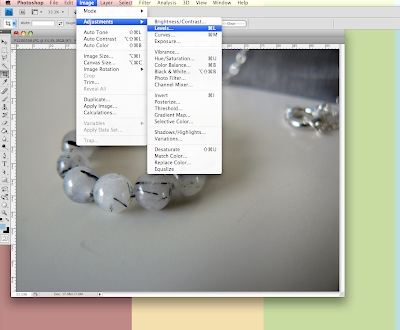
Now you will have to brighten your photo a bit. Go to "images" and then "adjustments" and then "levels".

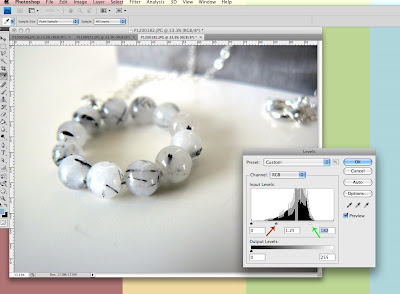
Now you have opened a new box and this is where you can adjust the brightness. Adjust the tabs that the green and red arrows are pointing to until the image is to your liking. The middle tab controls the midtones of the image and the right tab controls the highlights. You can see the final version of my edited photo in this screenshot.


This is a really helpful tutorial Sleepy Moon. Thanks.
ReplyDeleteGlad I could help! :)
ReplyDelete